I’ve been to work

I can’t believe it’s been more than two years since I wrote a post. Where have you been you wonder? I’ve been to work. I was a mom at home for more than 6 years. With both kids at school, it was time to go back. I’m not working full time for now (about 25 h/week). Still, I didn’t find time to share my projects on the blog. However, I did take time to sew. And I do share a bit on Instagram. And I continued going at guild meetings. What a great community.

After two years, I thought I would share with you the quilts I’ve worked on during that time. I won’t go into the details for each of them (or else I’ll never finish writing this post). But I have lots of pictures to share with you.

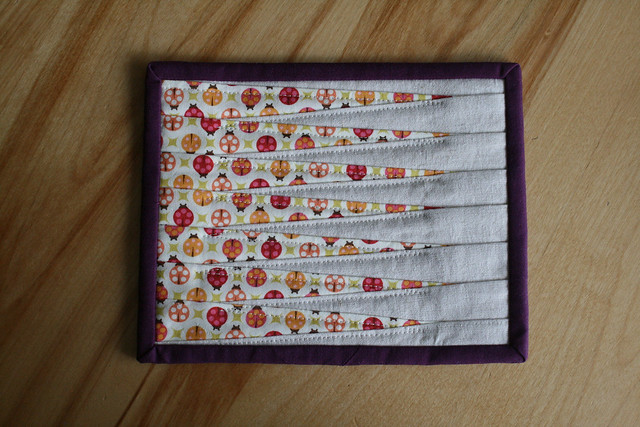
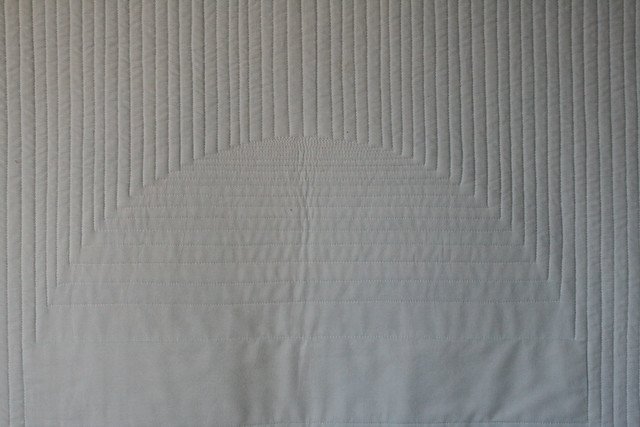
First, here a quilt a did for the Michael Miller Luxe challenge that took place for QuiltCon two years ago. I wasn’t able to finish it in time for the deadline. But I did finish it in time to offert for Christmas to my mother. She was so happy! On that Christmas, I also receive something special from her: a painting from her that represented me as well as a quilt exhibit showing my own designs from the past years. For those curious, you can see it here.

In the Woods Quilt

Here a close-up of the quilting followed by picture of the back:

In the Woods Quilt
In the Woods Quilt

I didn’t have a lot of finishes in 2017. But here is one I had started in a class with Libs Elliot.You can read more about it here. It is called Le temps des sucres and I offered it to my stepmother on Christmas 2017.

Le temps des sucres

And here is a close-up of the quilting:

Le temps des sucres

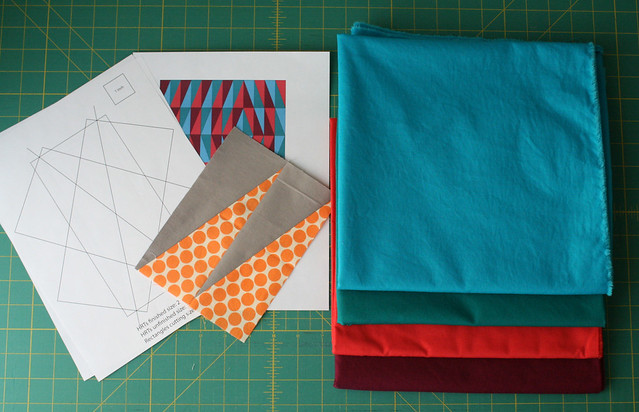
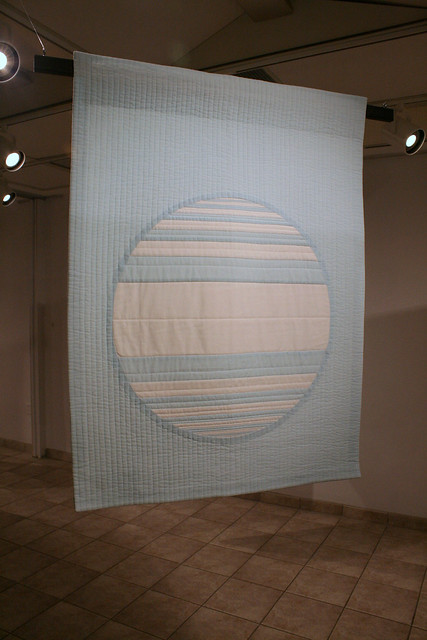
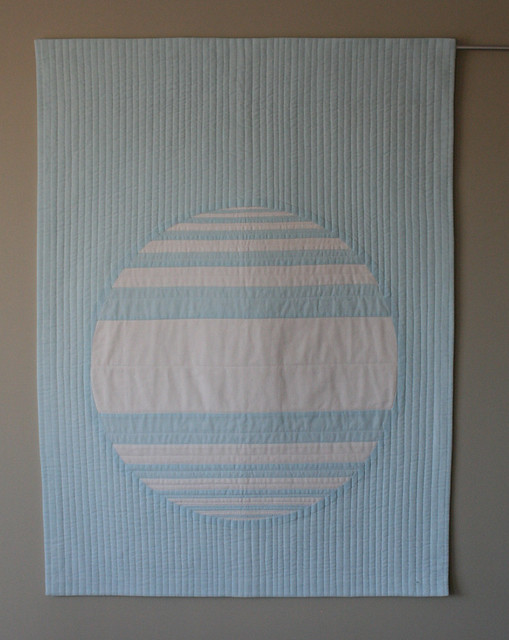
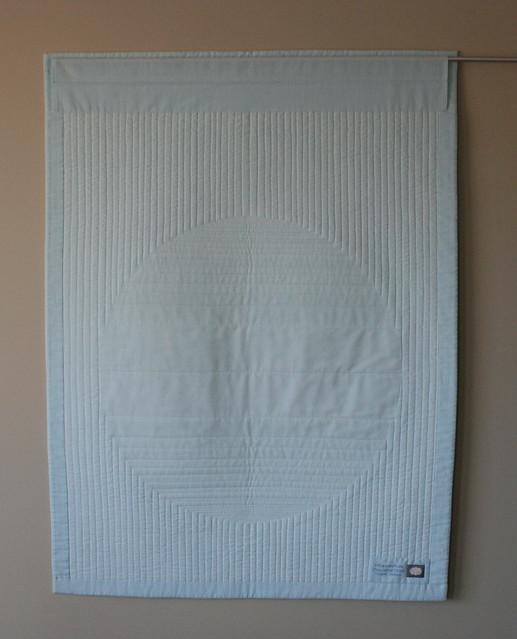
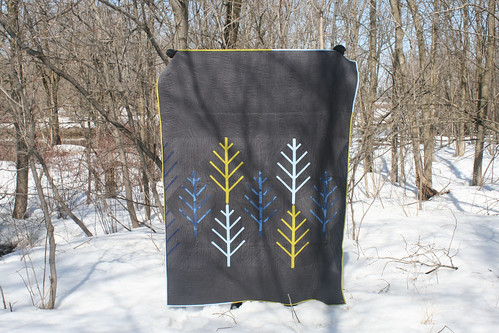
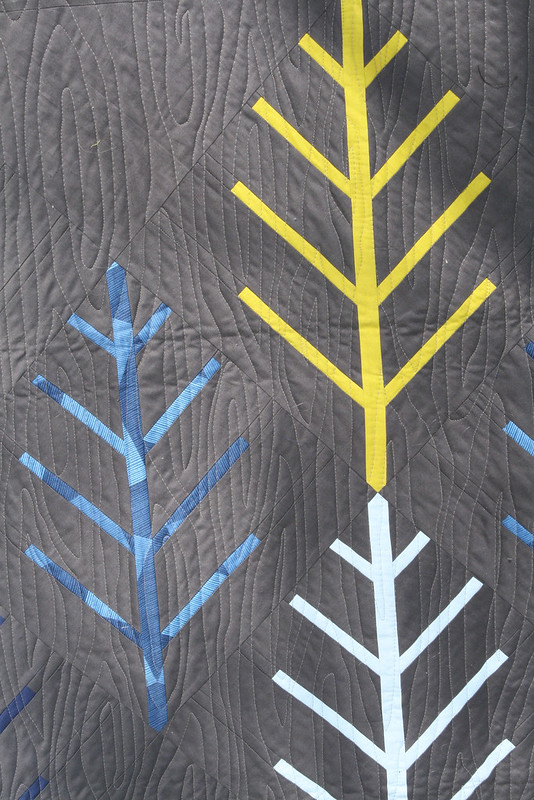
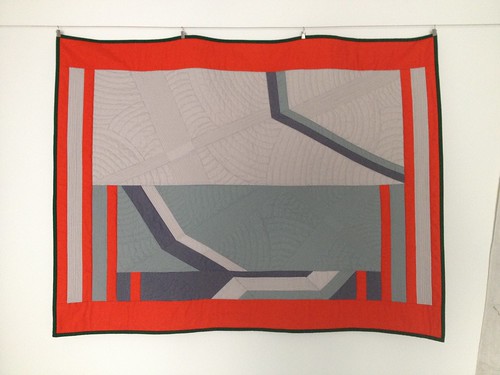
The next one is a quilt I made as part of a challenge organised by the Mtl MQG. We had to create a quilt inspired by a Metro station in Montreal, read all about it here. The one I designed was inspired by the concrete artwork named Relief by Claude Théberge at Métro de l’Église on the green line. Here is a picture a took as source of inspiration:

Metro Challenge Quilt

I used the quilting to represent the texture in the concrete.  I never took a good picture of the finished quilt. But here is the picture I had shared on Instagram. You can see the different quilts that were made by the guild members here.

Metro Challenge Quilt

This summer, I finally quilted an improv quilt I started back in June 2016. You can read more about it here.

A Try at Improv Quilt


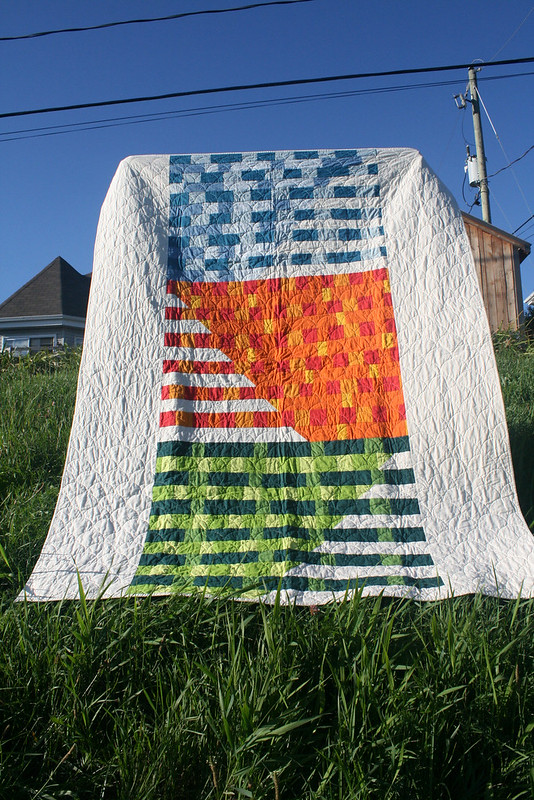
I did quilt it using my quilting frame as mentioned in the first post. I used a scallop wood template coming with the frame. I really appreciate those templates and I love the texture that the scallops added to the quilt.

A Try at Improv Quilt

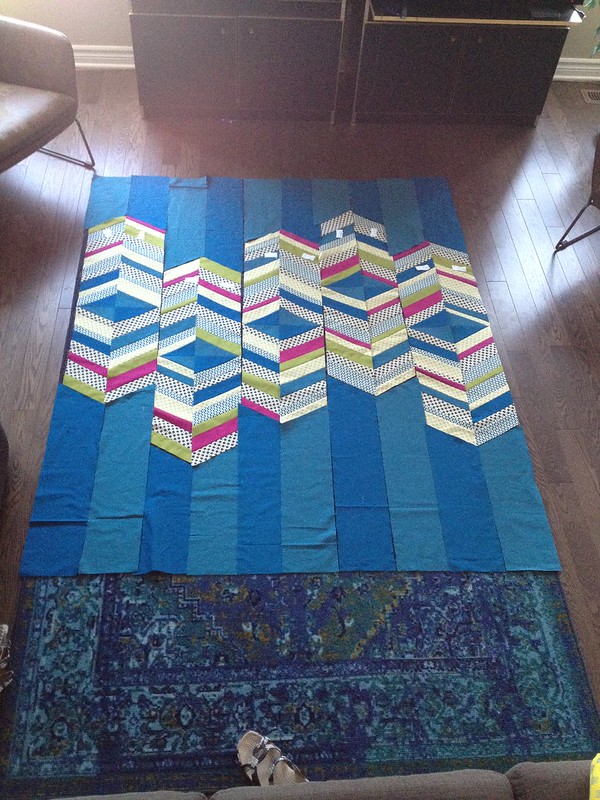
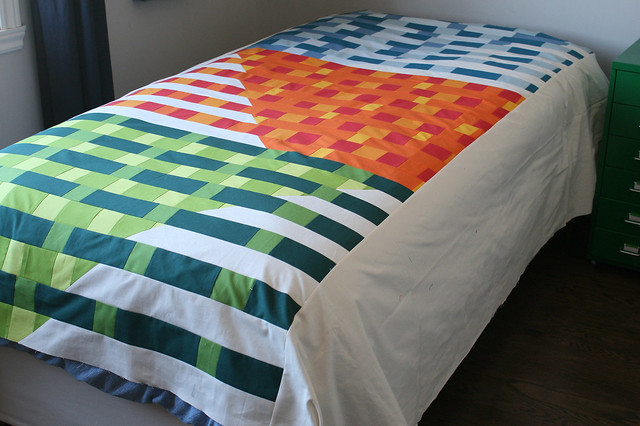
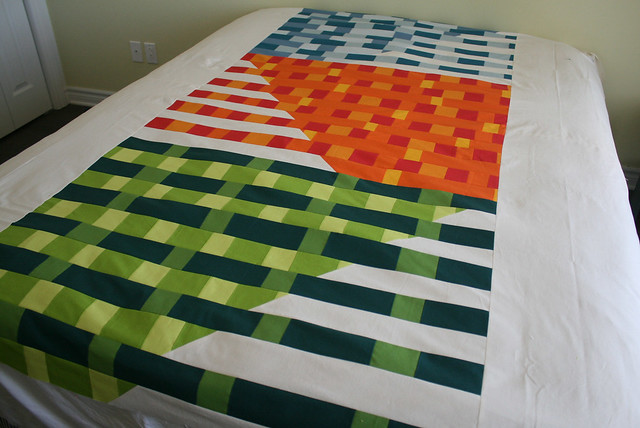
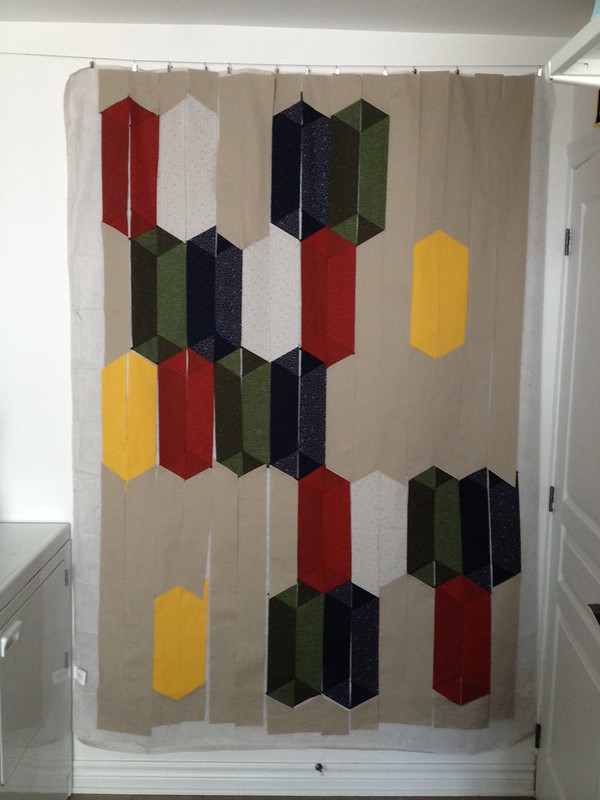
This December, I finished a quilt for my sister that I’ve been working on in the past year. I called it Keepsake from Japan as I made it with fabrics brought from there by my sister a few years ago. I took a while to find an idea of what I wanted to do with them. I decided to go with a design inspired by the Disco quilt pattern by Jaybird using the Hex N More Ruler. Unfortunately, I didn’t take a picture before offering it to my sister. But here are in progress pictures I had shared on Instagram.

Keepsake from Japan
Keepsake from Japan

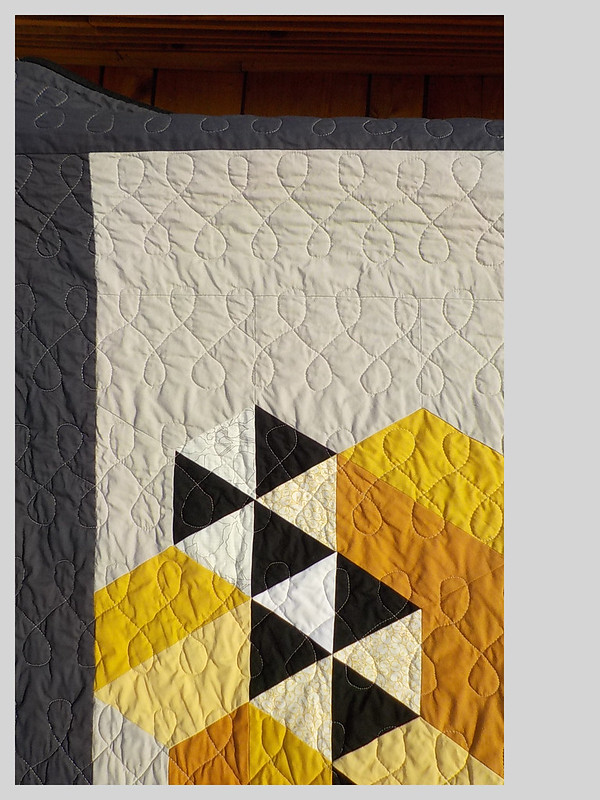
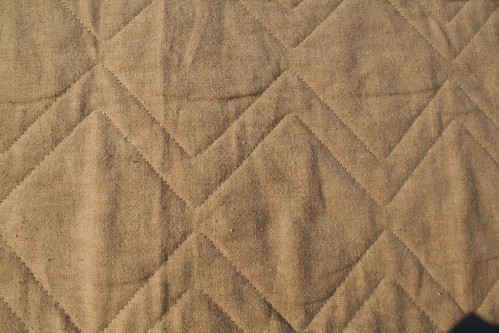
The last quilt I finished was for my grand-mother. I finished it just in time to offer it to her for Christmas. It was made from a charm pack from the Gleaned fabric collection by Carolyn Friedlander. I was my first time with flying geese blocks. I combined the prints with different solids from my scrap stash that I used as the sky for the blocks. I did this after a great demo by one of our guild member (see here). I used Essex linen for the rest of the quilt.

Geese Wave Quilt

Her is a close-up of the quilting. Again I used one of the wood templates coming with my Little Grace quilting frame.

Geese Wave Quilt

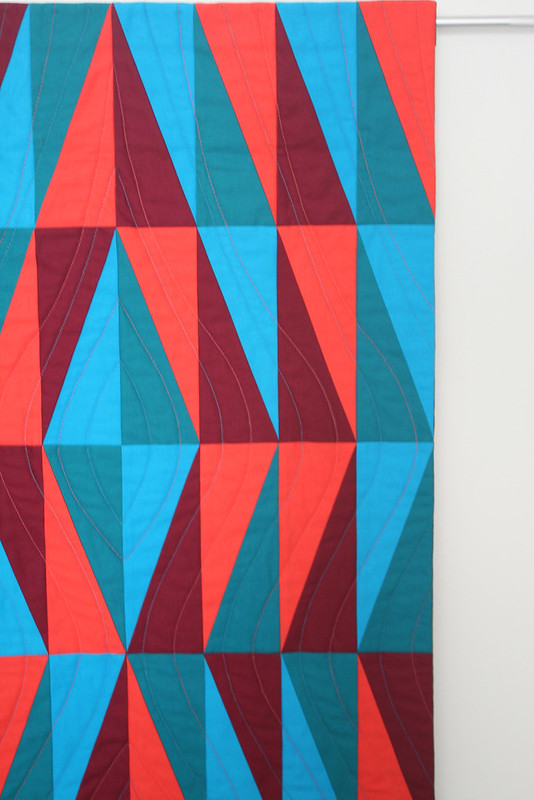
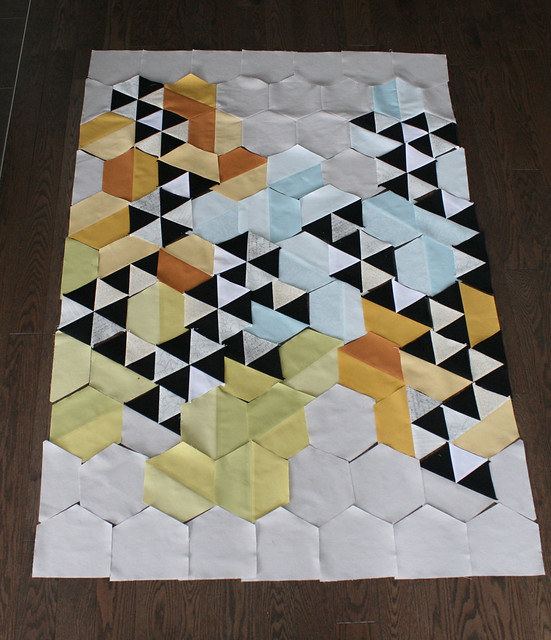
Here is picture I took when I finished assembling the top. It shows in more details the different prints.

Geese Wave Quilt

Finally, here is a quilt I worked on about a year ago and that I just installed on the quilting frame. I’ll try not to wait two years to show you the finished result!

Improv Herringbone Quilt

Facets Quilt

One year ago, the Montreal Modern Quilt Guild went to visit the Guido Molinari Foundation. As I mentioned in this post, this lead to a challenge to all members to create a quilt inspired by the work of this Montreal artist. In April I presented my plan, today I want to share with you the finished quilt. It was inspired by a series of paintings named “Structure triangulaire”. My previous post explains how I went from there to create my design. Here is the result:

Facets quilt

I decided to name it “Facets”. As I was brainstorming for a name, someone suggested diamonds and it made me think of facets. I thought it was representative of this quilt. The symmetry in the design makes me think of two aspects of a situation. Also, the facets can represent the contrast in the quilt: cold vs warm colors and dark vs. lighter colors.

I decided to go with some curves in the quilting to bring a little softness to the design. Finally, I chose to face this quilt for the binding (following this great tutorial).

Facets quilt

I’m currently working on my Michael Miller Fabric challenge. I don’t think I’ll be ready to submit it to QuiltCon 2017, but I’ve been having fun with it. Those challenges are keeping me busy! Next one for the members of the Montreal MQG is really exciting. We need to create a quilt inspired by a Metro station, read all about it here.  This year is the 50th anniversary of the Montreal Metro system, so it makes the challenge a bit more special. I can’t wait to get started on this. It should be really interesting to see what everyone will come up with.

Color Bliss on Spoonflower

Most of us now read blogs trough readers like Bloglovin. But, I’ve made a few changes to my blog in the past year. So today, I invite you to come and have a look. One of them was to add galleries. You can now have a look at the different pictures I posted on Flickr. You can flip through them directly from my blog with one page by project category (See menu Galleries). For example, here is the page for Quilts. But most importantly, I added a section for my portfolio of textile designs. I love designing patterns and I thought I would share a bit more about it with you.  Part of it is private (Private Portfolio sub-menu). If you are interested to have a look at a broader range of my work for licensing, please contact me.

I’ve made those changes a while ago, so why share it with you today? Because I have worked on some new designs that are now available for sale on Spoonflower. Recently, I designed a collection of basics in different colors of the rainbow. Mostly geometric patterns mixing hand-drawn and vector elements. I also used coding (Processing)  to generate the layout for most of them. I really had fun designing this set of prints.

Color Bliss

I named the collection Color Bliss. Here is an overview of the different prints. You can find the different prints at Spoonflower. The patterns are also available for licensing on Shutterstock.

colorblissgif

When I ordered samples of these prints, I also ordered a fat quarter of a print I designed earlier this summer for one of the Spoonflower contest. It’s called Filed of Roses and you can find it here for sale.

Field Of Roses

I hope you love the different prints. Next time, I’ll try to show them as part of some projects. I might do a cooling case for my Clover mini-iron using the Field of Roses print. This is something I’ve been wanting to make for a while, but now I might just have the motivation for it.Thanks for taking the time to visit the blog today.


Wrapsody handbag and more

Back in April, I ordered some fabrics from Mad About Patchwork to make my-self a bag. I ended-up making much more with it. I finished the bag it-self last week, so let me share all  those projects with you.

For the bag, I got the pattern Wrapsody handbag by Studio Kat Design. For the exterior fabric, I chose some linen blends, one from the Zephyr collection by Rashida Coleman-Hale for Cotton + Steel and the other, a Mochi Dot in black by Moda. I also bought coordinating quilting cottons for the inside. I was so busy with the kids this summer, this was the only project I had time to work on (a bit like last year). But here is the result.

Wrapsody handbag


Wrapsody handbag

Doing mostly quilting projects, it’s when I go back to projects like this that I realize my sewing skills have improve. I was surprise of how well it went. For the strap, I was looking for a leather one. Because I just love the mix between fabric and leather. Two weeks ago I ordered one from LeatherWorldstore from the UK on Etsy. I was so surprised with how fast I got it and with the quality of the leather. This is certainly something I’ll do again for other projects.

Even thought I bought the fabrics used to make the bag, I did make a few other things with it first. I made some teachers gifts: a few lanyards, a lunch bag and a pencil case.

Teachers gifts

For the lunch bag, I did something similar to the one in this post, inspired by the Purl Soho lunch bag. But, I made triangle boxed corners for the bottom . Something, I’ve been meaning to try for a while. It makes corners so much simpler and I like the result.


Teachers gifts

For the pencil case, I followed the tutorial for this case (in French). The link to the actual tutorial isn’t obvious, so here it is. I decided to use ByAnnie’s Soft and Stable for the interfacing. It was a bit too bulky for the size of the project, but the case definitely holds its shape.

Teachers gifts

I also made a cute little coin-pouch for my sister with the fabrics.

Coin Pouch

The pattern is my own. I find it a bit to big. But, I just love the shape and how it sits in the palm of your hand.

Coin Pouch

And now that I’ve used almost all that fabric, I’m ready to jump on another project. And one of them will be the MIchael Miller challenge for QuiltCon. I signed-up for the challenge and bought a bit of fabric for it …

A Try at Improv

Earlier this year, I read Sherri Lynn Wood‘s book: Improv Handbook for Modern Quilters. I heard so much good about her and her approach to improvisational piecing, I thought it was about time I give it a try. I did participate in an Improv Round Robin last year at the meetup between the Montreal and Ottawa MQG. But, doing it with a limited amount of time, was just to much for me. I decided I should give it a second chance by doing a quilt at my own pace. Still, improv really is a challenge for me. I have a hard time letting go and doing a quilt without a plan. Also,usually when I have a plan, I do all the math at the beginning and stick to using a ruler. So, I thought it would be interesting to try something freehand.

I really enjoyed reading Sherri Lynn Wood’s book and I like her score approach. For me imposing some constraints can help creativity. For my first quilt, I decided to use her Score for Strings. I first chose tree colors and a few fabrics for each, all solid colors in different tones.

Improv Quilt - Fabrics

Then I started cutting some strips to build 2 panels for each color, one darker and one lighter. Unfortunately, the only picture I have of that step is the one I posted on Instagram. Then, I recut my panels into strips in the opposite direction. I must say that at that point I did have to plan what I would do with my strings. I did a few sketches and finally chose this one which was inspired by artist Carlos Cruz Diez.

IMG_8598

For each color, I sewed my strips together alternating between the lighter and darker ones. But for the lighter strips, I removed a length of the strip by cutting it at a 45 degree angle and replacing it with a strip of Kona cotton in Bone. The length I was removing was increasing at each row.

When I started this project, I had a lap quilt in mind. But, when I finished assembling the 3 panels I realized I would end up with a much larger quilt as the height was almost 90″. To balance things out, I created side panels with all Bone fabric I had left home. This is the largest quilt I ever made. Here is the quilt top on my son’s twin size bed.

Improv Quilt Top

Here it is on our queen size bed, it’s a bit to short for it on the sides but it gives you a better overview.

Improv Quilt Top

I was wondering how I would quilt such a large quilt on my home sewing machine. But, the answer just came up to me unexpectedly. A member of our guild who is moving to a smaller space was selling her Little Gracie II quilting frame for a really good price. I could not miss this opportunity. I spent some time last week making space for it in our basement and setting it up.

IMG_8595

This is a frame for which you set up your domestic sewing machine on a carriage, and the carriage moves on rails in two directions. If you want to know more about it, you can look at this YouTube video. Now, I have to be patient. I have a few projects to finish first before my boys finish school. So, I might not be able to play with it right away. But, I look forward to it. And this quilt might be one of the first project I’ll do with it. I’ll keep you posted! As for improv, I will certainly try it again. The Score For Bias Strip Petals from the Improv Handbook is something I’d like to try.

Upcoming Quilt Shows

I just shipped my quilt “A Sprinkling of Stars” to be displayed at the national juried show Quilt Canada 2016.
NJS_Artist_Logo
The exhibit is taking place on June 15 -18, 2016, near Toronto, Canada. See information here. It’s the first time, I have a quilt in that show. I wish I could be there to see all the accepted quilts. Unfortunately, I won’t. But I will ask my friend Cinzia from Deux Petites Souris to take pictures for me as she will be teaching workshops there.

There is also a show organized by Courtepointe Quebec that is taking place the upcoming weekend (May 26-29, 2016). For those of you near Montreal, Salon 2016 is taking place at Collège André-Grasset (close to Métro Crémazie). See info here. The exhibit “Vitrine sur la courtepointe moderne” presented by the Montreal MQG  earlier in February at Maison de la culture Marie-Uguay, will be part of the show as a special exhibit. So, I’ll have two quilts there: my Metamorphosis quilt and my Contradiction quilt (taking place of my quilt “A Sprinkling of Star”). I will be going at the Salon on Saturday and I hope to see a few modern quilts. One thing that is sure, is that I will get to admire some remarkable  workmanship.

Le temps des sucres

Last month, the Montreal Modern Quilt Guild had visit from Libs Elliot for a workshop. I really love her work. It is really unique. I like her approach, particularly how she uses programming to generate quilt patterns and how she introduces randomness in her quilts. It was great to meet her in person. We had such a great day. It was the first time we were so many members to sew together. And as we were all working on the same project, it was great to share our progress, throughout the day and even as we were a preparing for the workshop. We had some great discussions on fabric selection online and and in the meeting preceding the workshop.

We had chose Libs Elliot’s Weight of Love workshop. A pattern was provided and we had to cut our fabric prior to the workshop. We had to cut triangles, half-hexagons and hexagons. It was recommended to use the Hex N More ruler by Jaybird Quilts. I rarely used specialty rulers, but I really enjoyed using that one. It’s versatile and well designed. I will certainly use it in other projects.

I auditioned so much fabric to use for this quilt. I even ordered a bundle of solid blue fat quarters. In the end, I decided to go with what I had in my stash. I use some black and white combined with some light gray and pastels. It was inspired by these rugs, particularly the picture with the rug in B&W, blue and green hanging on the wall.

In the workshop, we learned how to assemble our hexagonal blocks, assemble the rows and then join them using y-seams. During that day, I had time to assemble two rows and join them. I did modify the original pattern a bit as I wanted to make it my own. And also because I didn’t want to make the appliqué of the large hexagon (a bit of laziness I guess). So, all rows are the same length. I just finished assembling all my blocks. Now, I need to assemble the remaining rows and join them (the hardest part). As I was laying down my blocks to prepare my rows, I thought it was a good time to share my progress.

"Le temps des sucres" Quilt

On my way home from the workshop, I realized the colors of my quilt are much like the colors of nature at this time of the year. Our little town is surrounded by the country. And as I was driving I could observe the light blue sky, the fields that still had that golden yellow from fall with hints of green, and spots were the snow hadn’t melted yet. So serene. This weekend as we went to the sugar shack, the temperature was similar and I thought I should name my quilt “Le temps des sucres”. Do you know the proper way to translate this in English? I just love that time of the year!

Ready to Take on the Guido Molinari Challenge

Back in November, the Montreal Modern Quilt Guild organized a visit to the Guido Molinari Foundation. Guido Molinari was a renowned abstract painter from Montreal. He died in 2004. But, his gallery is still open to the public. Before his death, he created a fondation to continue perpetuating his art and abstract painting in general. Our group was welcomed by the executive director of the foundation and his assistant. When we were there, the exhibit was on a series of paintings and screen paintings by Molinari, named Quantifiers.  Like in most of his work, he explored color and their interactions with each other. In this series, it was subtle changes of tones. And how the width of different strips could change our perception of color and create rhythms. All our group really enjoyed the guided tour and the passionate and generous explanations on Molinari’s life and work. And even though the people from the gallery were surprise to receive visit from a quilt guild, we could all see how his work could translate into quilts.

Following that visit, our guild proposed a new challenge to us: make a quilt inspired by Molinari. I have been looking at his work since then and I finally settled on a series of paintings named “Structures triangulaires” as my source of inspiration. You can see one of these paintings exposed in Musée d’art de Joliette in this post. He did a series of paintings with these simple triangular structures in which he permuted warm and cold colors to create the perception of more complex structures. The paintings were composed of 4 rectangles split in half by a diagonal, creating half-rectangle triangles. By playing with the layout of the different triangles, he created different variations. You can read a good explanation in the last section of this article from La Vie des Arts (in French, link to the PDF)

This made me think of my half-rectangle triangle (HRT) table runners (see here and here) and the tutorial I had written for Sew Mama Sew! So, I decided to explore that concept. I combined different variations of layout for 4 HRTs I had seen from his work to create an even more complex structure. I’m settled on a layout. I did some new templates for the HRTs as their size will be different than the ones used in the tutorial. I did some test blocks. And I chose my fabric (Kona cottons in Lagoon, Ultra Marine, Coral and Bordeaux). So, I’m now ready to take on the challenge!

Guido Molinari Challenge - Ready Set Go


Random Projects

Today, I though I’d share a few small projects I didn’t take the time to share in the past months. First, I made two placemats before Chritmas for each of my sons teacher.

Placemats

My sons helped me chose the patterns and fabrics. I had proposed a few paper-piecing patterns. One chose the Lil’ Fox by Sonja for Artisania.  The other, a free apple pattern by Electric Quilt, which I adapted a bit.

The second project was for a mug bag swap that we had in January at the Montreal MQG. I made my own pattern for it. But, the design was inspired by a small leather pouch I first saw on on Pinterest. I love simple designs and I often my inspiration in leather projects. See more about what inspires me in this Pinterest board.

Mug Bag

Mug Bag

The last project I want to share was for a mug rug swap. We had a meet-up between the Ottawa MQG and Montreal MQG this weekend. And for the ice breaker, we did a little swap. As I was looking what I could do for my mug rug, I stumble upon a quilt made using the Stepping Stones pattern by Judy Niemeyer. I thought the block would look great as a mug rug. So, I made my-self a paper-piecing template inspired by the block. Here is the result.

Mug Rug

Metamorphosis Quilt

A few weeks ago, I presented one of the quilt I had in the exhibit by the Montreal Modern Quilt Guild. Here I am to present you the second one. It’s named Metamorphosis and I made this one to represent the minimalist category in the show. I already mentioned this quilt here as I was design it last year. See this post about the design process and the making of the quilt top. Here it is pictured in the show.

Metamorphosis Quilt

I love optical art and here a few illustrations that inspired me for this quilt: here, here and here. I love how a simple change in line directions can create new shapes. I wanted to explore this concept with this quilt, particularly with the quilting. I used straight-line quilting with my walking foot. I quilted lines 1/2″ apart and changed their directions as I was crossing the inset circle. So at the top and bottom of the circle, the horizontal lines are very close together and as we get to the center they get further apart.

Metamorphosis Quilt

I love the result seen from the back. I would love to make another quilt based on this idea. This time a whole cloth quilt with the same quilting in contrasting thread. The only is thing I dislike is that there isn’t enough quilting in the circle center to hold the fabric flat. So if I ever do so, I would need to think of something to improve this.

Metamorphosis Quilt

Metamorphosis Quilt

For the binding, I chose to face this quilt. This was the first time I was doing so. I thought it was appropriate for this quilt and I was happy with the result. Here is a great tutorial if you would like to try it.

If you are from the Montreal area and didn’t have a chance to see the exhibit by the Mtl MQG at Maison de la Culture Marie-Uguay, you’ll have a second chance to do so. The quilts will be part of the show organized by Courtepointe Québec on May 26-29 2016.